DR FIELD and BRUSH MOWER Operations Instructions
Browse online or download Operations Instructions for Lawnmowers DR FIELD and BRUSH MOWER. DR FIELD and BRUSH MOWER Operating instructions User Manual
- Page / 40
- Table of contents
- TROUBLESHOOTING
- BOOKMARKS
- FIELD and BRUSH MOWER 1
- Table of Contents 2
- Safety for Children and Pets 4
- Slope Operation 5
- General Safety 5
- A Note to All Users 6
- Specifications 8
- Unpacking the Mower 8
- To Install the Brush Deck 9
- Connecting the Battery Wire 9
- Adding Oil and Gasoline 10
- Check the Tire Pressures 10
- The Pre-Start Safety Check 11
- Stopping the Engine 12
- Obstacle Tips 13
- If the machine gets hung up 13
- Cold Weather Operation 14
- Cutting Brush and Saplings 14
- Reverse 14
- Battery Care 15
- Charging the Battery 16
- Lubrication 16
- To Replace the Blade Belt 17
- To Replace the Drive Belt 18
- • Torque Wrench (optional) 19
- • Gloves 19
- • (2) 1/2" Wrenches 19
- • Flat-head screwdriver 20
- • Needle Nose Pliers 20
- Removing the Wheels 21
- Adjusting the Parking Brake 22
- Transmission 22
- Recycling a Used Battery 23
- Troubleshooting Table 24
- SYMPTOM POSSIBLE CAUSE 25
- 28 DR 28
- Parts List – Power Assembly 30
- Schematic – Power Assembly 31
- 32 DR 32
- FIELD and BRUSH MOWER 32
- 34 DR 34
- 36 DR 36
- 38 DR 38
- End of Season and Storage 40
Summary of Contents
DR® FIELD and BRUSH MOWER SAFETY & OPERATING INSTRUCTIONS Serial No. Order No. DR Power Equipment Toll-free phone: 1-800-DR-OWNER (376-9637) Fax
10 DR® FIELD and BRUSH MOWER Adding Oil and Gasoline Tip: To avoid confusion, we recommend leaving the caps ON the Fuel and Oil Fills until
CONTACT US AT www.DRpower.com 11 Chapter 3: Operating The DR FIELD and BRUSH MOWER This chapter covers the procedures for starting and stopp
12 DR® FIELD and BRUSH MOWER Before Starting the Engine 1. Check the oil level every time you use the machine. 2. Check the gas level. 3.
CONTACT US AT www.DRpower.com 13 4. Move the Throttle Control to the IDLE position. 5. Turn the Key to the OFF position and remove it for s
14 DR® FIELD and BRUSH MOWER Cutting Brush and Saplings 1. When cutting woody material, small saplings, etc., allow the machine to ride up a
CONTACT US AT www.DRpower.com 15 Chapter 4: Maintaining The DR FIELD and BRUSH MOWER Regular maintenance is the way to ensure the best perfor
16 DR® FIELD and BRUSH MOWER Before performing any maintenance procedure or inspection, stop the engine, wait five (5) minutes to allow all p
CONTACT US AT www.DRpower.com 17 1. There is one Grease Fitting below the black Belt Guard that needs lubrication (Figure 11): • The Belt I
18 DR® FIELD and BRUSH MOWER Figure 19 3 Belt Guides Clutch Drive Spring Removed Clutch Bracket 3. Remove the Belt from the Pulley (Fig
CONTACT US AT www.DRpower.com 19 9. Loosen the Belt Retainer Bolts on the outside of the Frame (one on each side) and slide the Retainer bac
2 DR® FIELD and BRUSH MOWER Table of Contents Chapter 1: General Safety Rules 3 Chapter 2: Setting Up The DR FIELD and BRUSH MOWER 7 Chapte
20 DR® FIELD and BRUSH MOWER Before performing any maintenance procedure or inspection, stop the engine, wait five (5) minutes to allow all p
CONTACT US AT www.DRpower.com 21 Adjusting the Differential Lock In/Out Cable NOTE: If the Differential will not Lock In or Out, the Cable m
22 DR® FIELD and BRUSH MOWER Adjusting the Parking Brake Tools needed: • 1/2" Open End Wrench 1. Tighten or loosen the Parking Brake A
CONTACT US AT www.DRpower.com 23 Please dispose of used batteries responsibly, according to your local hazardous materials regulations. Neve
24 DR® FIELD and BRUSH MOWER Chapter 5: Troubleshooting Most problems are easy to fix. Consult the Troubleshooting Table below for common pro
CONTACT US AT www.DRpower.com 25 Troubleshooting Table (Cont.) SYMPTOM POSSIBLE CAUSE Engine runs fine but the machine will not move. ⇒ The
26 DR® FIELD and BRUSH MOWER Troubleshooting Table (Cont.) SYMPTOM POSSIBLE CAUSE The Wheel Drive Clutch and/or Brake lever will freeze up du
CONTACT US AT www.DRpower.com 27
28 DR® FIELD and BRUSH MOWER Chapter 6: Parts Lists, Schematic Diagrams And Warranty Parts List - Handlebar Assembly NOTE: Part numbers liste
CONTACT US AT www.DRpower.com 29 Schematic – Handlebar Assembly 081008
CONTACT US AT www.DRpower.com 3 Chapter 1: General Safety Rules Labels Your DR FIELD and BRUSH MOWER carries prominent labels as reminders fo
30 DR® FIELD and BRUSH MOWER Parts List – Power Assembly NOTE: Part numbers listed are available through DR Power Equipment. Ref# Part# Desc
CONTACT US AT www.DRpower.com 31 Schematic – Power Assembly 031810
32 DR® FIELD and BRUSH MOWER Parts List – Brush Deck Assembly NOTE: Part numbers listed are available through DR Power Equipment. Ref# Part#
CONTACT US AT www.DRpower.com 33 Schematic – Brush Deck Assembly 080912
34 DR® FIELD and BRUSH MOWER Parts List – Frame and Drive Assembly NOTE: Part numbers listed are available through DR Power Equipment. Ref# P
CONTACT US AT www.DRpower.com 35 Schematic – Frame and Drive Assembly 081008
36 DR® FIELD and BRUSH MOWER Wiring Diagram – Briggs and Stratton Electric Start031810
CONTACT US AT www.DRpower.com 37 Wiring Diagram – Kawasaki Electric Start 031810
38 DR® FIELD and BRUSH MOWER Notes:
DR® FIELD and BRUSH MOWER 2-Year Limited Warranty Terms and Conditions The DR® FIELD and BRUSH MOWER is warranted for two (2) years against defects
4 DR® FIELD and BRUSH MOWER Tragic accidents can occur if the operator is not alert to the presence of children and pets. Children are often
75 MEIGS ROAD, P.O. BOX 25, VERGENNES, VERMONT 05491 ©2010 Country Home Products, Inc. All rights reserved 193101D Daily Checklist for the DR FIELD
CONTACT US AT www.DRpower.com 5 Slope Operation General SafetySlopes are a major factor related to slip and fall accidents, which can result
6 DR® FIELD and BRUSH MOWER A Note to All Users Under California law, and the laws of some other states, you are not permitted to operate an
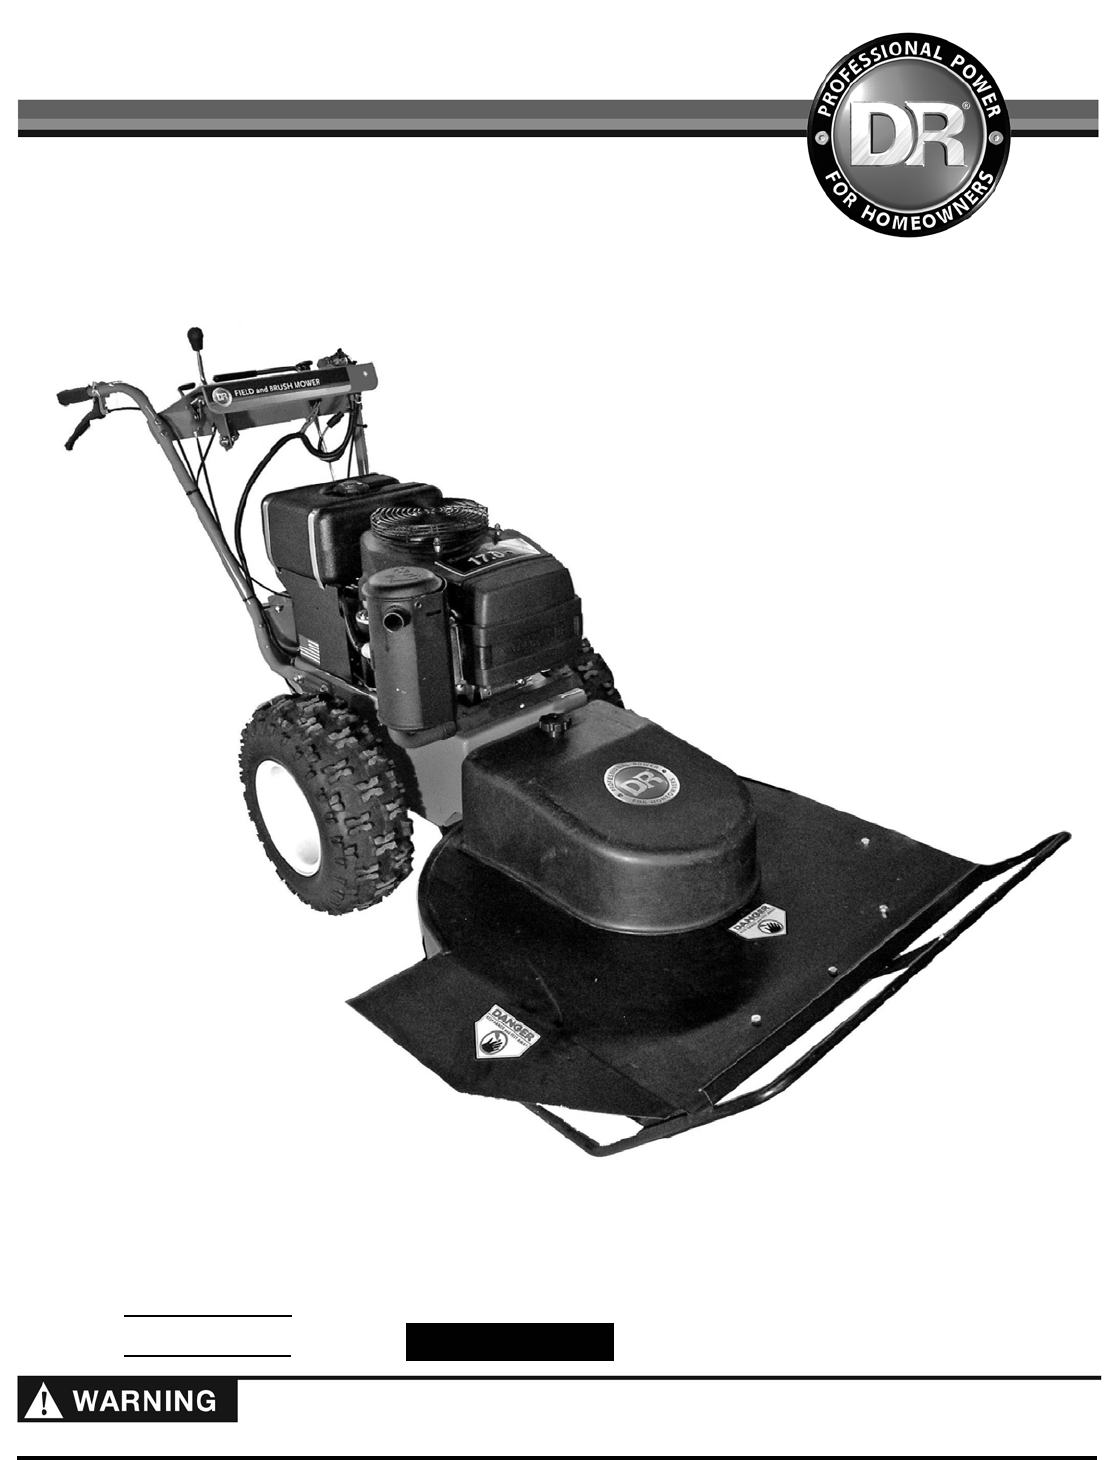
CONTACT US AT www.DRpower.com 7 Figure 1 Chapter 2: Setting Up The DR FIELD and BRUSH MOWER It may be helpful to familiarize yourself with t
8 DR® FIELD and BRUSH MOWER Specifications Premier Pro Pro-XL Engine See Engine Owners Manual for details See Engine Owners Manual for detai
CONTACT US AT www.DRpower.com 9 6. Attach the Deck to the Power Unit following the directions in the next section. The Belt is stored below
More documents for Lawnmowers DR FIELD and BRUSH MOWER


Related products and manuals for Lawnmowers DR FIELD and BRUSH MOWER
 (44 pages)
(44 pages)
(44 pages)
© 2020, manymanuals.com. All rights reserved. | 1.093 s |
 Manymanuals.com
 Manymanuals.de
 Manymanuals.fr
 Manymanuals.it
 Manymanuals.pl
 Manymanuals.cz
 Manymanuals.es
 Manymanuals-pt.com
Comments to this Manuals